

 EU
EUCNC engraving is a subtractive manufacturing process that uses a computer-controlled machine to remove material from a surface and create precise text, patterns, logos, or functional markings. It is widely used in manufacturing, signage, jewelry, and industrial part marking because it delivers repeatable detail, supports metal and plastic parts, and reduces manual marking work. This guide is written for engineers, product designers, OEMs, and procurement managers who need custom engraved parts for prototyping or mass production, and it explains how the process works, the main machine types and tools, compatible materials, typical applications, and best practices for getting clean, consistent results.
What Is CNC Engraving?
CNC engraving is a subtractive process in which a computer-controlled machine removes material from a workpiece surface to produce text, patterns, logos, or functional markings. The machine follows G-code instructions generated from a CAD/CAM workflow, which means the output is repeatable and does not depend on operator skill during the cutting stage.
It differs from etching in one fundamental way: engraving is mechanical, producing tactile depth by cutting; etching is chemical, removing material through corrosion. The distinction matters for applications where surface integrity or depth control is a specification requirement.
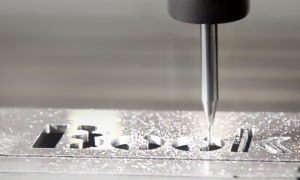
Advantages of CNC Engraving
CNC engraving offers several practical advantages over manual or pantograph-based methods:
High precision:
Industrial-grade machines hold tolerances as tight as 0.00005 inches, while desktop units routinely achieve 0.001-inch accuracy. This level of precision is sufficient for most text and logo work, enabling high-quality, detailed results.
Consistent output
Once a program is set, every part produced is identical. This consistency is essential for batch production where uniformity across parts is a critical requirement.
Efficient spindle speeds
CNC spindles typically operate at a minimum of 6,000 RPM for engraving, with speeds up to 20,000 RPM enhancing cutting efficiency. Higher speeds improve productivity by allowing faster material removal.
Wide material compatibility
The same CNC engraving machine can process various materials such as metal, plastic, wood, and composites. This versatility is achieved by changing tools and adjusting machining parameters, with tool geometry and coating playing key roles in optimizing performance.
Reduced labor requirements
CNC engraving minimizes direct manual labor since the machine executes the programmed instructions. Operators focus primarily on setup, monitoring, and quality inspection, leading to improved operational efficiency.
Design flexibility
CNC engraving enables the creation of intricate and complex designs that are difficult or impossible to achieve manually. This includes detailed patterns and 3D relief work suitable for production volumes, expanding creative possibilities.
CNC Engraving Machine Types
Desktop CNC Engravers
Compact units for low-volume work, with desktop cnc engraving machines often equipped with compact spindles or laser modules for small custom work. Used for nameplates, signs, and custom jewelry. Work area is usually under 400 × 400 mm.
CNC Milling Machines
Rigid multi-axis machines that handle deep metal engraving, 3D relief, and mold textures, making them well suited to intricate designs. In contract manufacturing, these CNC machines can combine engraving with cutting and milling in the same setup.
CNC Routers
Large-bed machines such as a CNC router for wood, acrylic, foam, and soft plastics. Common in sign shops and furniture work, ideally with a precise, flat work surface for shallow detail work. Not rigid enough for hard metals.
Laser Engravers and Laser Engraving
Non-contact systems using a focused beam to vaporize or discolor the surface. Suited for glass, leather, and anodized aluminum. Fast on shallow markings, limited on depth.
CNC Engraving Tools
Tool selection determines line quality, achievable depth, and which materials can be processed.
V-Bit (V-Groove Cutter)
The most common engraving tool, a V-bit is a common engraving cutter typically made of solid carbide for durability. Tip angle typically ranges from 30° to 90°. Tip geometry also affects engraving precision and tool life, and the small point is delicate if speeds and feeds are off. A narrower angle produces finer lines; a wider angle produces broader cuts with a beveled profile. V-bits are used for text, logos, decorative V-carving, and line art, usually at depths around 0.001″ to 0.020″, though cuts over 0.009 inches can shorten tool lifespan.
Ball-Nose End Mill
The hemispherical tip allows smooth transitions in 3D surface work. Ball-nose mills, also called a ball end mill, are the standard for relief carving and mold texture engraving. Its rounded tip is more durable than pointed engraving tools, though it is less suitable for sharp-line text.
Flat End Mill (Square End Mill)
Flat-bottomed cutting tool used where a square-profile channel is needed. In engraving, flat end mills are used to clear the floor of a V-carved pocket or to produce channel lettering with flat bases. Not suited for fine detail work due to the square corner geometry.
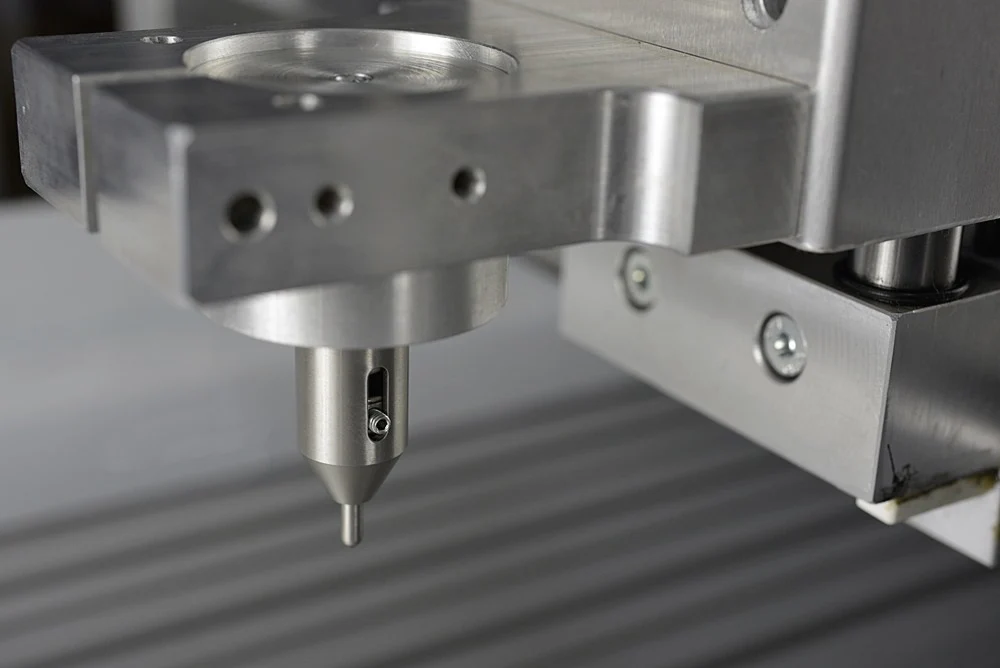
Diamond Drag Bit
A non-rotating tool with a diamond tip on a spring-loaded shank. The tip is dragged across the surface under controlled pressure, displacing material rather than cutting it. The result is a bright, polished scratch mark. Commonly used for serial numbers, barcodes, and trophy engraving. Because the tool does not rotate, there is no spindle speed to set. It works on most metals and glass but is not suitable for soft materials that deform under the tip.
Straight Engraving Bit
Single-flute or double-flute bits for linear engraving on plastics and soft metals. Single-flute geometry improves chip evacuation, which is important on acrylic and PVC that can melt and re-weld if chips accumulate. Coated tools can last longer and reduce heat absorption during the engraving process, especially in plastics and soft metals. Double-flute geometry provides better cutting balance on softer metals.
Tapered Ball-Nose Bit
A tapered body with a ball-nose tip. The taper adds rigidity while the rounded tip handles fine 3D detail in deep or narrow cavities where a standard ball-nose mill would deflect. Used in jewelry, fine art engraving, and precision mold work.
Compatible Materials
Metals
Aluminum, brass, copper, stainless steel, and titanium are all machinable. Aluminum and brass engrave easily at high speeds with standard carbide tooling, while harder materials need more careful tool and parameter selection because the material’s hardness and thermal properties affect the engraving operation. Stainless steel and titanium require slower feed rates and heat management, so the right method matters.
Plastics
ABS, acrylic, polycarbonate, Delrin, and PEEK are common. They machine quickly but are prone to burr formation and heat-induced softening if spindle speeds are not matched to the material.
Wood
Compatible with both rotary and laser engraving. Wood is anisotropic, and a v cutter is commonly used for V-carving and dimensional lettering: cutting across the grain produces cleaner edges than cutting along it. It is the lowest-cost material for entry-level CNC engraving work.
Glass and Ceramics
Brittle materials that require controlled cutting forces. Laser engraving is generally preferred for glass. Mechanical engraving requires diamond drag or diamond-coated rotary tools.
Composites
Carbon fiber, G10/FR4, and fiberglass laminates are abrasive and will wear standard carbide tooling quickly. Diamond-coated tools are required to maintain acceptable tool life.
Applications and Engraving Methods
CNC engraving is used across a range of industries:
- Industrial part marking: serial numbers, part numbers, barcodes, compliance marks such as UDI on medical components, and traceability markings on manufactured components for each project.
- Mold and die work: texture engraving on injection mold cavities to produce specific surface finishes on molded parts, where branding details may also be added.
- Signage and awards: nameplates, plaques, directional signs, and trophies; for example, engraved logos and presentation pieces.
- Jewelry and watchmaking: decorative engraving on precious metals and watch cases, often requiring specialized expertise.
- Electronics: panel labeling and enclosure marking.
- Aerospace and defense: permanent identification on components where adhesive labels are not permitted.
Best Practices
Match parameters to the material.
Using the correct speed and feed settings tailored to the specific material is crucial for achieving optimal engraving results. If the speed is too slow, the tool may produce fine dust instead of clean chips, which can cause melting or burning of the material. Conversely, if the speed is too fast, the tool may deflect, leading to inaccurate cuts and poor surface quality. Proper parameter matching ensures efficient chip formation, maintains tool integrity, and results in crisp, clean engravings.
Split deep cuts into multiple passes.
When engraving deeper features, it is better to perform 2–3 lighter passes rather than a single deep cut. Multiple passes reduce the load on the tool, helping protect the tool tip and the workpiece surface while minimizing deflection and the risk of breakage. The final pass should be a light finishing cut that smooths the surface and enhances detail clarity. This approach prolongs tool life and improves the overall quality and consistency of the engraving.
Pick the right stepover.
For ball-nose end mills used in 3D engraving, selecting the appropriate stepover is vital. On visible surfaces, a stepover of 5–10% of the tool diameter delivers a smooth finish with minimal scalloping. For surfaces that will be polished or coated after machining, a larger stepover of 15–20% is acceptable since post-processing will refine the surface. Correct stepover settings balance machining time and surface quality.
Default to climb milling.
Climb milling, where the cutter rotates in the same direction as the feed, generally produces a cleaner surface finish and reduces burr formation in engraving operations. It also reduces tool wear and heat buildup. However, if the CNC machine has significant backlash, conventional milling may be safer to avoid tool marks or inaccuracies. Understanding your machine’s characteristics helps determine the best milling direction.
Design with the tool in mind.
When preparing designs for CNC engraving, consider the geometry of the cutting tool. Sans-serif fonts are preferred because their simpler shapes engrave more cleanly. Choose engraving software that supports your tool’s geometry and intended results. Maintain minimum line widths at least 1.5 times the tool tip diameter to avoid incomplete cuts or fragile features. Avoid internal corners smaller than the tool radius to prevent tool overloading and ensure smooth toolpaths.
Solve chip evacuation up front.
Effective chip and debris removal is essential to maintain visibility and cut quality during engraving. Use compressed air or mist coolant for metals to clear chips from the cutting area. For plastics, single-flute tools help improve chip evacuation and reduce melting caused by heat buildup. Wood engraving benefits from dust extraction systems to prevent clogging and burning. Planning for chip evacuation improves surface finish and reduces tool wear.
Minimize tool stickout.
Reducing the length of the tool protruding from the holder (stickout) significantly improves surface finish and tool stability. Excessive stickout increases tool deflection and vibration, leading to poor engraving quality. Pair minimizing stickout with regular checks for tool runout, replacing collets if runout exceeds 0.01 mm. This practice ensures consistent and precise engraving results.
Always run a test cut.
Performing a test cut on an offcut of the same material before starting the full engraving job can save significant time and material. A quick five-minute test verifies the program, toolpath, and machine settings, allowing adjustments to be made before committing to the final part. This precaution helps avoid costly rework and ensures the engraving meets quality standards.
