Plastic injection molding is the cornerstone of modern manufacturing, and insert molding stands out as a powerful technique for creating multi-material components. By embedding non-plastic inserts (like metal) into plastic parts, insert molding delivers enhanced functionality, strength, and design flexibility.
Whether you’re designing automotive components, medical devices, or consumer electronics, understanding the insert molding design process is critical to avoiding defects and optimizing costs.
This guide dives into the best practices for insert molding design, explores compatible materials, and provides a step-by-step overview of the process. Let’s get started.
What is Insert Molding?
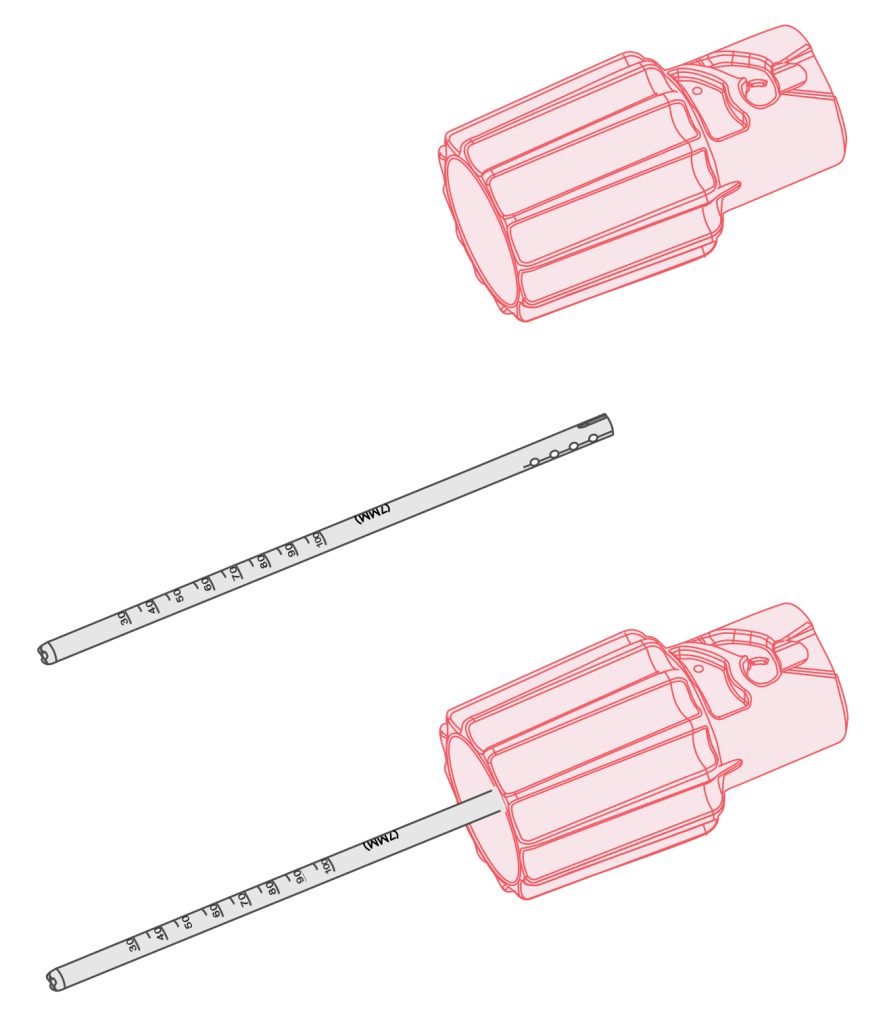
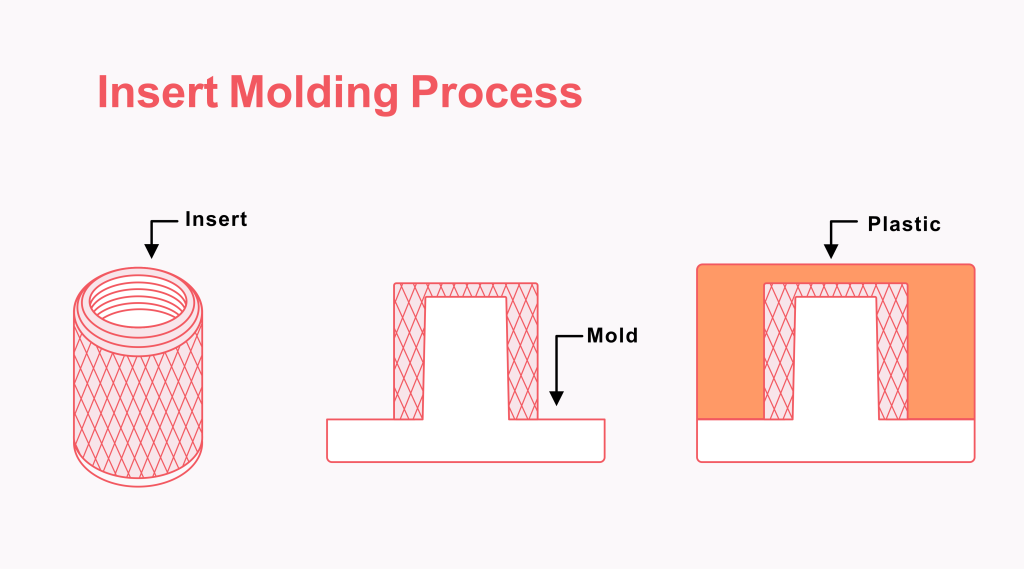
Insert molding is a manufacturing process where a non-plastic insert (e.g., metal, ceramic, or wood) is placed into a mold cavity, and molten plastic is injected around it. As the plastic cools and solidifies, the insert becomes a permanent part of the component. This technique is widely used to create parts like scissors, screwdrivers, knobs, and knife blades, as well as complex components for industries such as automotive, medical, and electronics.
The mold consists of two sides: the A-side (cavity side) for show surfaces and features, and the B-side (core side) where the part stays during ejection. Proper design ensures smooth part transfer and high-quality results.
Insert Molding Process: Step-by-Step
Prepare the Tools
Set up the injection molding machine and mold based on the part design. Tight tolerances ensure high precision.
Load the Inserts
Place pre-fabricated inserts into the mold cavity. Automated loading is ideal for mass production, while manual loading suits small batches.
Inject Molten Plastic
Inject plastic into the mold cavity under high pressure. The mold closes, and the plastic flows around the insert, filling the cavity completely.
Cool and Solidify
Allow the plastic to cool and solidify around the insert. This ensures a strong, permanent bond between the insert and the plastic.
Eject the Part
Open the mold and eject the finished part. Proper draft angles and mold design ensure smooth ejection without defects.
Post-Production Processing
Perform additional processes like deburring, heat treatment, or laser engraving to meet final product requirements.
Materials for Insert Molding
Choosing the right materials is crucial for successful insert molding. The insert and plastic must bond well and meet the functional requirements of the final product.
Here’s a breakdown of common materials:
Thermoplastics
Thermoplastics are recyclable plastics that melt at high temperatures and solidify upon cooling. They are versatile, flexible, and impact-resistant. Common thermoplastics include:
Polystyrene: Lightweight, rigid, and transparent, ideal for molded parts.
Polyethylene: Offers chemical stability and electrical insulation, available in LDPE, MDPE, and HDPE densities.
Nylon (Polyamide): Lightweight, durable, and wear-resistant, perfect for high-performance applications.
Thermoplastic Elastomers (TPE): Combines rubber-like flexibility with the recyclability of plastics.
Thermosets
Thermosets are rigid, heat-resistant plastics that cannot be remolded once solidified. They are ideal for high-temperature applications. Examples include:
Epoxy: Corrosion-resistant and electrically insulating, often used in electrical components.
Phenolic: Heat-resistant and durable, suitable for electrical and mechanical parts.
Elastomers
Elastomers are rubber-like materials that return to their original shape after deformation. Common options include:
Natural Rubber: Flexible and durable, ideal for high-tensile-strength applications.
Polyurethane: Highly elastic, abrasion-resistant, and temperature-tolerant, used in machinery and household items.
Insert Molding Design Guidelines
Designing for insert molding requires careful planning to avoid defects and ensure optimal performance. Follow these best practices:
Avoid Sharp Corners
Sharp corners cause stress concentration and disrupt plastic flow. Use rounded corners (radii) to improve stress distribution and reduce defects.
Optimize Draft Angles
Add a slight taper (1–2° for smooth surfaces, up to 5° for heavy textures) to vertical mold faces to facilitate easy part ejection and prevent drag marks.
Design Inserts Properly
Inserts should be smaller than the plastic part, with at least 0.4 mm embedded in the mold cavity. Maintain a molding thickness of at least one-sixth of the insert’s diameter to prevent sink marks.
Use Suitable Boss Diameters
Bosses (cylindrical protrusions) should be 1.5 times the insert’s diameter for optimal strength. Oversized bosses increase costs, while undersized ones compromise part integrity.
Choose Durable Resins
Strong resins minimize delayed splitting caused by plastic shrinkage around metal inserts.
Ensure Mechanical Bonding
Metal inserts cannot chemically bond with plastic, so rely on mechanical bonding (e.g., threading or knurling) for secure integration.
Control Wall Thickness
Ideal wall thickness ranges from 0.08 to 0.16 inches. Too thin walls cause air traps, while overly thick walls increase costs.
Advantages of Insert Molding
Insert molding offers several advantages over traditional manufacturing methods, making it a popular choice for producing complex, multi-material parts. Here are the key benefits:
Enhanced Strength & Durability: Strong bonding between plastic and inserts reduces stress points.
Reduced Assembly: Eliminates secondary operations, combining components into one part.
Design Flexibility: Enables complex shapes and multi-material integration.
Cost Efficiency: Lowers labor, material waste, and inventory needs.
Improved Aesthetics: Seamless finish with customizable branding.
Better Performance: Offers electrical insulation and vibration damping.
Increased Reliability: Secure, consistent, and automated production.
Lightweighting: Combines lightweight plastics with functional inserts.
Environmental Benefits: Reduces waste and supports recyclability.
Versatility: Suitable for diverse industries and compatible with various insert materials.
Applications of Insert Molding
Insert molding is used across industries to create high-performance parts, including:
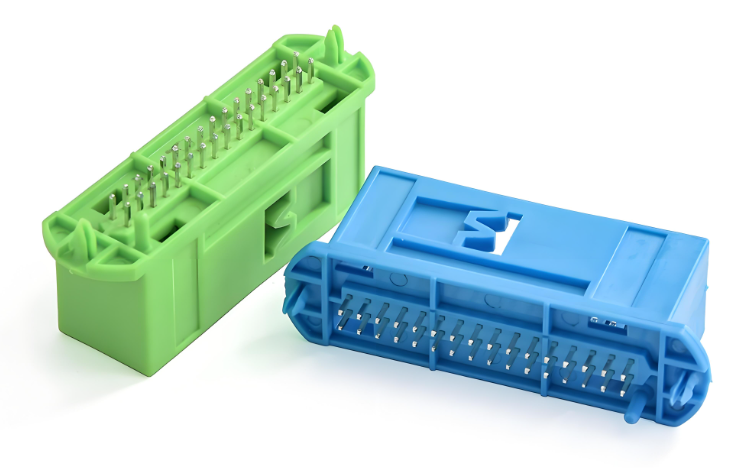
Automotive: Sensors, connectors, and housings.
Medical: Surgical instruments, device housings, and diagnostic tools.
Consumer Electronics: Buttons, knobs, and connectors.
Industrial: Tools, handles, and machinery components.
Conclusion
Insert molding is a versatile and cost-effective manufacturing technique that combines the best properties of plastic and non-plastic materials. By following the design guidelines outlined in this guide, you can create high-quality, defect-free parts that meet your application’s requirements.
Whether you’re working on automotive, medical, or consumer products, mastering insert molding will help you optimize performance, reduce costs, and streamline production.
For more insights on plastic injection molding and advanced manufacturing techniques, stay tuned to our blog. If you’re ready to start your next insert molding project, contact us today for expert guidance and support.