In today’s fast-paced manufacturing world, the phrase “Work smarter, not harder” has never been more relevant. For manufacturers aiming to streamline product development, rapid prototyping is a game-changer.
This innovative approach allows companies to create physical prototypes and functional prototypes quickly, test ideas, and refine designs before committing to full-scale production.
In this guide, we’ll explore what rapid prototyping is, how it works, its key benefits, and the different types available. Whether you’re in automotive, aerospace, healthcare, or electronics, this article will help you understand why rapid prototyping is essential for modern manufacturing.
What is Rapid Prototyping?
Rapid prototyping is a process used to create physical models of a product design using advanced technologies like 3D printing, CNC machining, and laser cutting. It emerged in the 1970s as a way to accelerate product development and reduce costs.
Unlike traditional prototyping, which can be time-consuming and expensive, rapid prototyping leverages additive and subtractive manufacturing techniques to produce prototypes in hours or days rather than weeks. A crucial step in this process is uploading a CAD file, which ensures accurate production of parts based on detailed specifications and allows for quick generation of online quotes.
This method is widely used across industries to visualize designs, test functionality, and gather feedback before mass production. It’s particularly valuable for complex geometries, tight tolerances, and innovative materials.
How Does Rapid Prototyping Work? (5 Key Steps)
There are different types or methods of rapid prototype. Whichever it is, there are usually five stages. These stages define how rapid prototyping works. The five steps of rapid prototyping are as follows:
Step 1: Vision Definition
The first step is to understand the end-user’s needs. Conduct interviews, surveys, or market research to identify pain points and expectations. This stage sets the foundation for the prototype’s design and functionality.
Step 2: Identify the Main Features
Focus on the core features that address the user’s needs. Collaborate with cross-functional teams—engineers, designers, and product managers—to prioritize functionality over aesthetics at this stage.
Step 3: Build the Prototype
Choose the most suitable rapid prototyping method (e.g., 3D printing, CNC machining, or vacuum casting) to create the prototype. This step is crucial for translating digital designs into physical models.
Step 4: Share the Functional Prototypes
Distribute the prototype, including any custom parts, to stakeholders, end-users, or test groups.
Step 5: Feedback and Iteration
Analyze the feedback and iterate on the design. Rapid prototyping allows for quick adjustments, ensuring the final product meets user expectations and market demands.
Different Types Of Rapid Prototyping
There are several methods of rapid prototyping, each with unique advantages. These methods not only cater to creating high-quality prototypes but also extend to producing on-demand production parts. Here’s a breakdown of the most popular techniques:
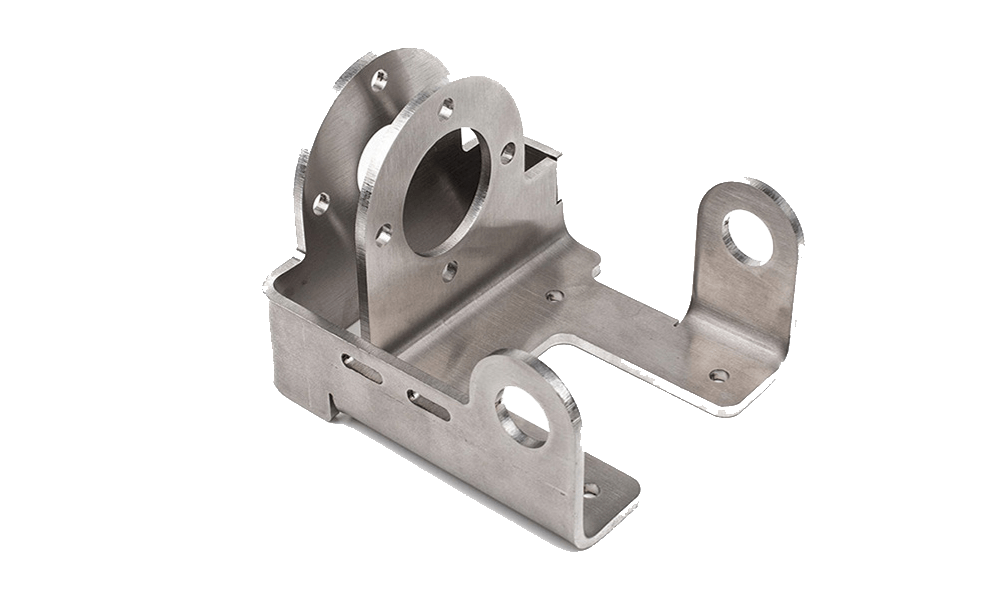
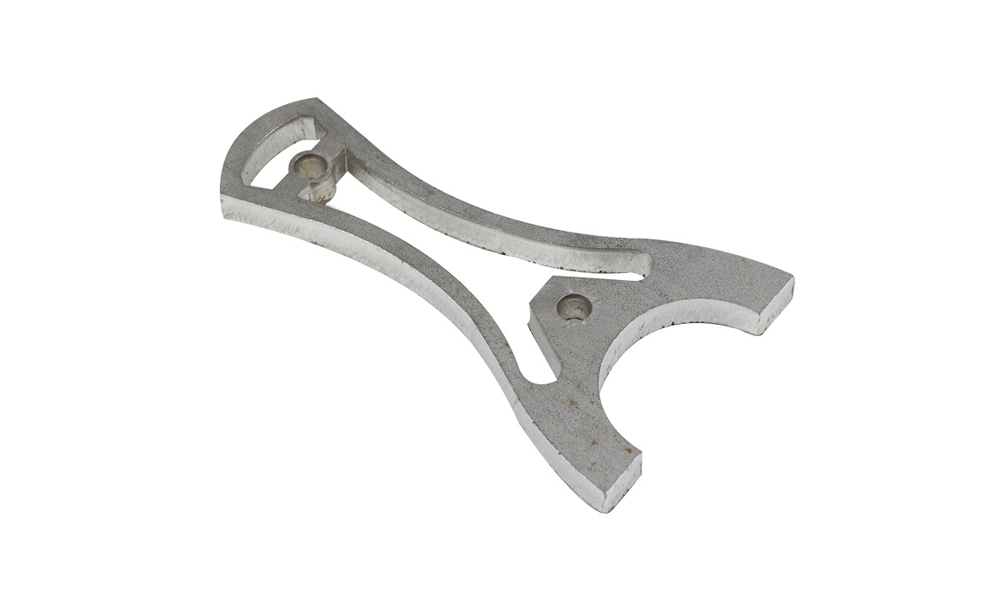
CNC Machining
Best for: High-precision prototypes with tight tolerances.
Materials: Metals, plastics, and composites.
Advantages: Superior accuracy, excellent surface finish, and compatibility with a wide range of materials.
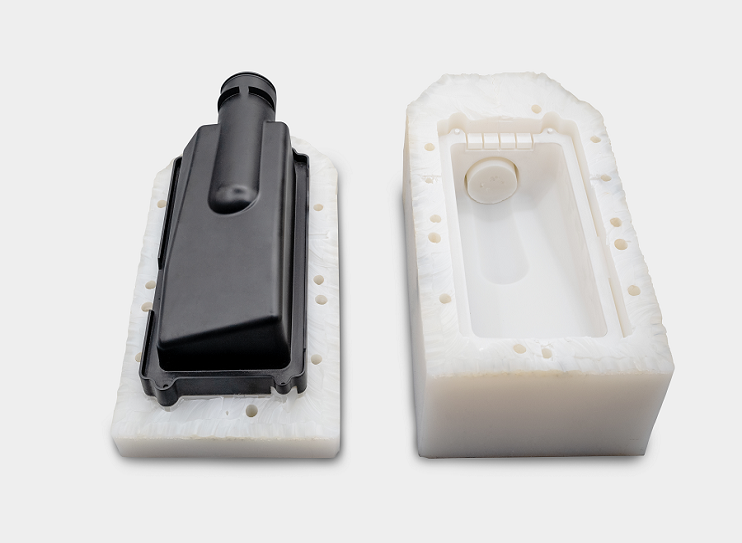
Vacuum Casting
Best for: Rubber and plastic parts.
Process: Involves creating a master model, a silicone mold, and producing parts using polyurethane.
Advantages: Low upfront costs, reduced lead times, and high-quality surface finishes.
Sheet Metal Prototyping
Best for: Metal parts and components.
Advantages: Allows for design corrections and quality control before full-scale production.
Laser Cutting and Engraving
Best for: Detailed prototypes in materials like stainless steel, aluminum, and cardboard.
Advantages: Versatility, precision, and ability to work with both hard and soft materials.
Applicable Industries
Laser cutting and engraving for prototypes are applicable in various industries. These technologies support the creation of complex geometries and designs. Some industries that use these technologies are:
Healthcare
Automotive
Electronics
Aeronautics
Defense
Laser cutting and engraving have transformed rapid prototyping greatly. These technologies have made the process cost-effective and fast and added versatility.
But there is one more technology for rapid prototyping worth discussing – 3D printing.
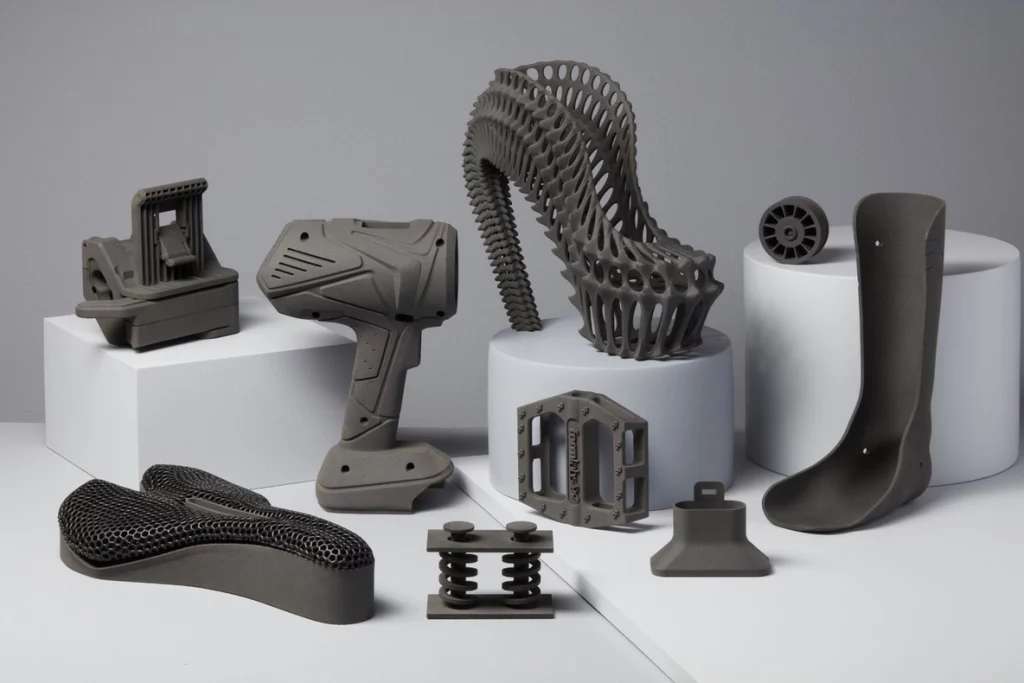
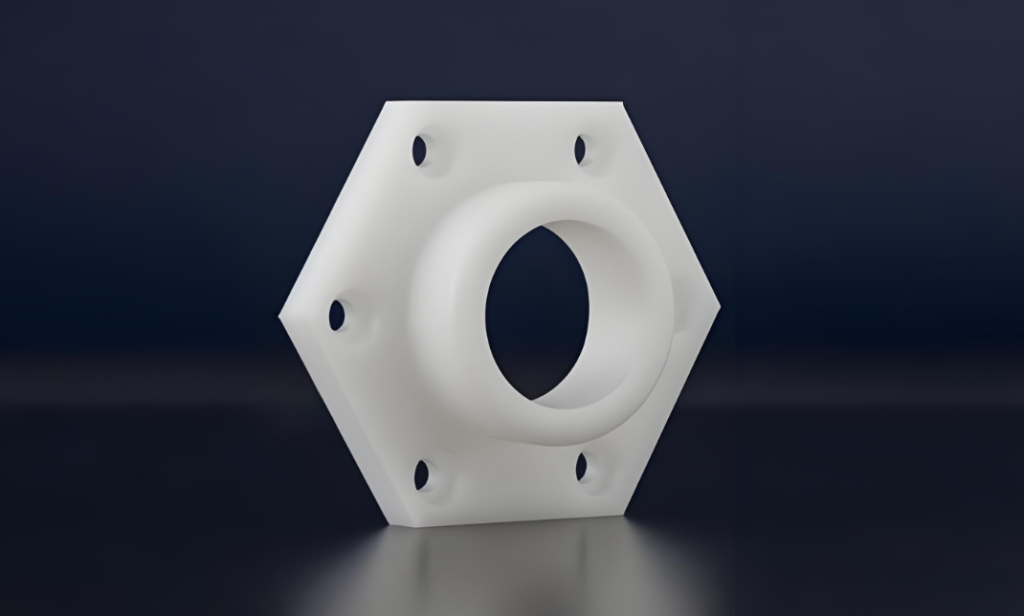
3D Printing/Additive Manufacturing:
You cannot discuss rapid prototyping and fail to mention 3D printing. That’s because the concept of rapid prototypes was inspired by the additive manufacturing method. 3D printing serves the main criteria of rapid prototyping: Speed, cost, and flexibility.
There are three types of 3D printing as discussed below:
Stereolithography (SLA)
SLA is a 3D printing method that entails hardening of a photopolymer layer after layer until the complete component is formed. A photopolymer is a type of liquid plastic that is sensitive to light. This process begins with the slicing of a 3D model into tiny layers.
When a layer comes into contact with a UV laser, it hardens. Subsequent exposures of layers to the light continue the formation of the model. When all the layers form, a 3D model emerges. After cleaning and further curing, the prototype is ready.
SLA is an effective method for creating tiny and intricate prototypes. An alternative method such as CNC machining may not be as effective in creating such prototypes for production parts. Check industries such as medical and jewelry. You will most likely find SLA as the prominent rapid prototyping method for prototypes.
Selective Laser Sintering (SLS)
Selective laser sintering is another additive manufacturing method that builds prototypes through fusion. Instead of plastic, this technique uses a special polymer powder. A laser fuses the layers until the 3D product is formed.
First, the system heats the build platform to near the melting point of the polymer powder. A blade spread the powder across the platform. A laser scans the area and selectively sinters. This fuses the layers. The process continues, each time the build platform is lowered and the blade spreads the powder for sintering.
When printing is complete, the operator lets the setup cool first. This could take hours. Then you can unpack the setup and clean the part.
With its high resolution and capability to produce functional prototypes, SLS is perfect for rapid prototyping. It outdoes SLA and FDM in terms of consistency of mechanical properties on the production grade parts.
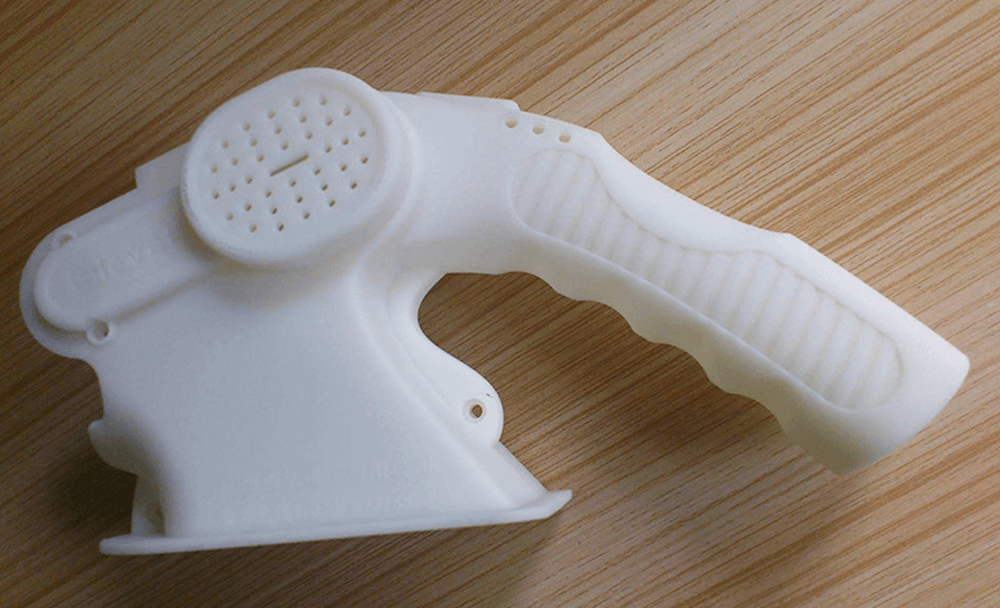
Fused Deposition Modeling (FDM)
FDM is probably what comes to the minds of most people when they think about 3D printing. Like in the previous method, there is a build platform in FDM. The machine operator loads it with digital files carrying the 3D model design. The machine is capable of translating these files into physical prototypes.
The machine uses a thermoplastic spool to build the prototype. It feeds this spool to the build platform in an extrusion format. The machine carries a three-axis system that supports the movement of the extrusion head.
Layer after layer, the prototype slowly forms. The process is complete when the part has cooled. You may need to cool the setup to speed up the process if necessary.
Benefits of Rapid Prototyping
Here are several benefits of rapid prototyping:
Faster Time-to-Market: Accelerates product development by enabling quick iterations and testing. This seamless transition from prototyping to large-scale production ensures that products can be brought to market efficiently.
Cost-Effective: Reduces the risk of costly errors during full-scale production.
Improved Collaboration: Provides tangible models for stakeholder engagement and feedback.
Material Testing: Allows engineers to evaluate different materials for performance and suitability.
Rapid prototyping is a versatile tool, but it’s most effective in specific scenarios. Here are the key situations where it shines:
1. After Initial Design Stages
Once you’ve defined the problem and gathered user requirements, rapid prototyping helps validate assumptions and refine the design. It bridges the gap between concept and reality, ensuring the product meets user needs.
2. Tight Deadlines
When time is of the essence, rapid prototyping speeds up the development process. It allows for quick iterations, enabling teams to meet tight schedules without compromising quality.
3. Stakeholder Engagement
Prototypes provide a tangible way to communicate ideas with stakeholders. Whether it’s investors, clients, or internal teams, a physical model fosters better understanding and alignment.
4. Complex Designs
For products with intricate geometries or advanced functionalities, rapid prototyping ensures accuracy and feasibility. It’s particularly useful in industries like aerospace, healthcare, and electronics.
5. Material and Functionality Testing
If you’re unsure about the best material or design for a product, rapid prototypes allow you to test multiple options quickly and cost-effectively.
Industries That Benefit from Rapid Prototyping
Rapid prototyping is a cross-industry solution, with applications in:
Automotive: Prototyping car parts, engine components, and interior designs.
Aerospace: Testing lightweight, high-strength materials for aircraft and spacecraft.
Healthcare: Creating medical devices, prosthetics, and surgical tools.
Electronics: Developing casings, circuit boards, and wearable devices.
Consumer Goods: Designing household products, packaging, and appliances.
Tips for Optimizing Rapid Prototyping
To get the most out of rapid prototyping, follow these best practices:
Choose the Right Method: Select a prototyping technique that aligns with your material, design complexity, and budget.
Focus on Core Features: Avoid overloading the prototype with unnecessary details. Stick to the key functionalities.
Iterate Quickly: Use feedback to make rapid improvements. The faster you iterate, the sooner you’ll arrive at the optimal design.
Collaborate Across Teams: Involve engineers, designers, and end-users in the process to ensure a well-rounded prototype.
Leverage Advanced Tools: Partner with experienced manufacturers like Aria Manufacturing to access cutting-edge technologies and expertise.
Conclusion
Rapid prototyping is no longer a luxury—it’s a necessity for modern manufacturing. By enabling faster iterations, reducing costs, and improving product quality, it empowers companies to stay competitive in today’s dynamic market.
Whether you’re developing a new product, testing materials, or engaging stakeholders, rapid prototyping offers a streamlined, efficient solution. With methods like CNC machining, 3D printing, and laser cutting, the possibilities are endless.
Ready to take your product development to the next level? Contact Aria Manufacturing today to learn how our rapid prototyping services can accelerate your next project.
Share This Post
We are a CNC Machining, Injection Molding, Sheet Metal Fabrication and 3D Printing Manufacturers...